There’s a special kind of magic that fills the air when homemade ice cream is churning, isn’t there? The anticipation, the sweet aroma, and that first delightful spoonful are memories cherished by many. And when it comes to creating these moments for your family and friends, a 4 Quart Ice Cream Maker stands out as the ultimate kitchen companion, ready to transform simple ingredients into a gallon of frozen bliss.
This isn’t just about making dessert; it’s about embracing a tradition, customizing flavors to perfection, and sharing joy. Whether you’re a seasoned dessert enthusiast or a curious beginner, this guide will unlock the full potential of your 4 quart ice cream maker, making you the undisputed champion of sweet treats in your home.
A Journey Through Time: The Evolution of Ice Cream Makers
The story of ice cream is rich with history, dating back to ancient times. But the journey to easily accessible homemade frozen delights truly began with the invention of the hand-crank ice cream churn in the 19th century. These early machines, often featuring wooden buckets, relied on manual effort to mix the ice cream base while surrounded by ice and salt – a method designed to lower the freezing point and rapidly chill the mixture.
Fast forward to today, and while the core principle remains, modern technology has brought forth the electric 4 quart ice cream maker. These marvels capture the nostalgic charm of their predecessors with their classic bucket designs but eliminate the strenuous hand-cranking. Now, a powerful electric motor does all the work, bringing the “old-fashioned” ice and salt method into the convenient, automatic age. This evolution means you can enjoy that authentic, creamy texture with minimal fuss, leaving you more time to savor the process and the delicious results.
What Makes a 4 Quart Ice Cream Maker Tick?
At its heart, a 4 quart ice cream maker is a cleverly designed system that uses the science of freezing point depression to create its magic. The most common type, and often the most beloved for its traditional results, is the ice-and-salt bucket model.
Components:
- The Canister: Typically made from heavy-duty aluminum, this is where your liquid ice cream mixture goes. It’s designed to conduct cold efficiently.
- The Dasher (or Paddle): This mixing arm fits inside the canister. Its role is to continuously churn the mixture, incorporating air and preventing large ice crystals from forming, which is key to that smooth, creamy texture.
- The Bucket: Often crafted from wood or durable plastic, this outer container holds the freezing agents: ice and rock salt.
- The Electric Motor: This is the brains of the operation. It typically sits on top of the bucket and powers the dasher (or in some models, rotates the canister itself), ensuring consistent churning without any manual effort.
How They Work Their Magic:
The principle is simple yet effective: you fill the inner canister with your chilled ice cream base. Then, you surround this canister within the larger outer bucket with alternating layers of ice and rock salt. The salt lowers the melting point of the ice, creating an icy brine that drops to a temperature well below 32°F (0°C). This super-cold environment rapidly draws heat away from the ice cream mixture in the canister. Simultaneously, the electric motor keeps the dasher turning, constantly scraping the frozen mixture from the canister’s cold walls and stirring it back into the center. This continuous agitation is crucial for producing a smooth, soft-serve consistency, preventing the mixture from freezing into a solid block of ice. In just 20 to 40 minutes, depending on your recipe and machine, you’ll have a fresh batch of frozen delight ready to enjoy.
Your Step-by-Step Guide: Using Your 4 Quart Ice Cream Maker Like a Pro
Making homemade ice cream with a 4 quart ice cream maker is surprisingly straightforward, turning a simple process into a delightful culinary adventure.
Preparation is Key:
- Chill Your Ingredients: This is non-negotiable! For the creamiest results, ensure all your liquid ingredients (milk, cream, sugar mixture) are thoroughly chilled in the refrigerator, ideally for several hours or even overnight. This pre-chilling drastically reduces the overall freezing time and improves consistency.
- Pre-Chill the Canister: Many manuals recommend chilling the aluminum canister in your freezer until it’s cold to the touch. This extra step helps jumpstart the freezing process.
- Prepare Your Mixture: Follow your chosen recipe, remembering not to fill the canister more than two-thirds full. The ice cream mixture expands as it freezes, and leaving this space prevents overflow and ensures proper churning.
Assembly and the Freezing Process:
- Assemble the Canister: Place the dasher inside the chilled canister, ensuring it’s properly aligned. Then, put the canister lid on securely.
- Position the Canister: Carefully place the assembled canister into the center of the outer bucket, making sure it sits correctly at the bottom.
- The Ice and Salt Ritual: This is where the magic really happens.
- Layering: Start by adding a small layer of crushed ice (approximately 6 cups) evenly around the base of the canister.
- Salt: Sprinkle about ½ cup of rock salt (or kosher/table salt if rock salt isn’t available) evenly over the ice.
- Repeat: Continue layering ice and salt until the mixture reaches the top of the canister, or just below the drainage hole on the side of the bucket. You’ll typically use 1-2 medium bags of ice and 2-4 cups of rock salt for a 4-quart batch. Remember, salt is essential; the more salt you use, the better the freezing process works.
- Engage the Motor: Slide the electric motor onto the rim of the bucket, locking it into place.
- Start Churning: Plug the power cord into an electrical outlet. The motor will start, rotating the canister and churning the mixture.
- Churning Time: Expect the process to take approximately 20-40 minutes.
- Stir the Ice and Salt: Periodically, every 10-15 minutes, give the ice and salt mixture a stir with a plastic stirrer to ensure even temperature distribution and prevent ice blockages. As the ice melts, you might need to add more ice and salt.
Post-Churning and Enjoyment:
- Stop and Unplug: Once the ice cream reaches a soft-serve consistency, or if the motor stops automatically (indicating it’s too firm to churn further), turn off and unplug the machine.
- Clean Up: Carefully remove the electric motor, then clear away the ice and salt from the top of the canister. Wipe the canister thoroughly to remove any salt water before opening.
- Serve or Store: Remove the dasher, scraping off any excess ice cream. You can serve your delicious, freshly made ice cream immediately for a soft, creamy treat. If you prefer a firmer consistency, transfer the ice cream to a freezer-safe container and “harden” it in the freezer for 3-4 hours. Many 4-quart models even include a lid for storing the canister directly in the freezer.
Beyond the Basics: Tips for Perfect Batches Every Time
Achieving that perfect, velvety scoop isn’t just about following instructions; it’s about understanding the nuances of your 4 quart ice cream maker. Here are some expert tips to elevate your homemade frozen desserts:
- Consistency and Texture Mastery:
- Preventing Ice Crystals: The continuous churning is your best friend here. Avoid stopping the machine prematurely. If your ice cream turns out hard or grainy, you might have used too much rock salt, causing it to freeze too quickly. Conversely, too little salt can inhibit proper freezing. Aim for the recommended 2-4 cups of rock salt per batch.
- Achieving Firmer Ice Cream: Homemade ice cream often has a milkshake-like texture right out of the churn. For a scoopable, firmer consistency, transfer it to an airtight freezer-safe container and “cure” it in the freezer for several hours.
- The Art of Mix-ins: While it’s tempting to add all your favorite bits at the beginning, resist! Hard ingredients like nuts, chocolate chips, or cookie dough should be added during the last few minutes of churning, or even better, stirred in after the churning process is complete. This prevents them from jamming the dasher and ensures they’re evenly distributed without getting crushed.
- Troubleshooting Common Issues:
- Dasher Jamming: If the dasher gets stuck, turn off the motor immediately. Often, an ice blockage in the bucket is the culprit. Break up the ice with a plastic stirrer and restart. Also, ensure your mixture isn’t thicker than soft-serve consistency while churning, or that you haven’t added hard mix-ins too early.
- Not Freezing Properly: The most common reasons are insufficient pre-chilling of ingredients or the canister, or not enough ice and rock salt. Double-check your ice-to-salt ratio and ensure your mixture starts out very cold. Alcohol can also inhibit freezing, so if your recipe includes it, add it toward the end of the churning cycle.
- Cleaning and Maintenance for Longevity:
- Immediate Cleanup: After enjoying your treat, promptly clean all parts. The canister, dasher, and lid should be hand-washed with warm, soapy water. Avoid harsh or abrasive cleaners.
- Motor Care: Never immerse the electric motor in water. Wipe it clean with a slightly damp, non-abrasive cloth.
- Drying: Ensure all parts are thoroughly dried before reassembling or storing. Don’t freeze a wet canister. Proper cleaning prevents residue buildup and ensures your 4 quart ice cream maker is ready for its next sweet adventure.
The Joy of Homemade: Why a 4 Quart Ice Cream Maker is a Must-Have
In a world full of mass-produced treats, embracing a 4 quart ice cream maker brings an authentic, joyful experience right into your kitchen. It’s more than just an appliance; it’s a gateway to creativity, health, and unforgettable moments.
Freshness and Customization Beyond Compare:
When you make ice cream at home, you control every single ingredient. This means no artificial flavors, preservatives, or high-fructose corn syrup—just pure, wholesome goodness. You can use organic dairy, fresh fruits, and high-quality extracts, tailoring every batch to your exact preferences or dietary needs. Have a craving for lavender honey ice cream or a dairy-free coconut mango sorbet? Your 4 quart ice cream maker makes it possible. This level of customization is simply not available with store-bought options.
A Hub for Family Fun and Entertainment:
A 4 quart ice cream maker is an instant party starter. Its generous capacity is perfect for family gatherings, barbecues, birthdays, or just a lazy Sunday afternoon treat. Involving children in the process, from mixing ingredients to layering ice and salt, creates wonderful memories and teaches them about cooking in a fun, hands-on way. The anticipation as the machine churns, the excitement of choosing mix-ins, and the shared delight of that first scoop foster connection and joy. It transforms dessert-making into a collective, interactive experience.
Healthier Choices and Cost-Effectiveness:
Beyond the fun, making your own ice cream can be a healthier choice. You can reduce sugar content, use natural sweeteners, or incorporate nutritious ingredients like fresh berries and nuts. Over time, making ice cream at home can also be surprisingly economical. While there’s an initial investment in the machine and ingredients, the cost per serving often works out to be far less than premium store-bought ice cream, especially when you’re making a full gallon with your 4 quart ice cream maker.
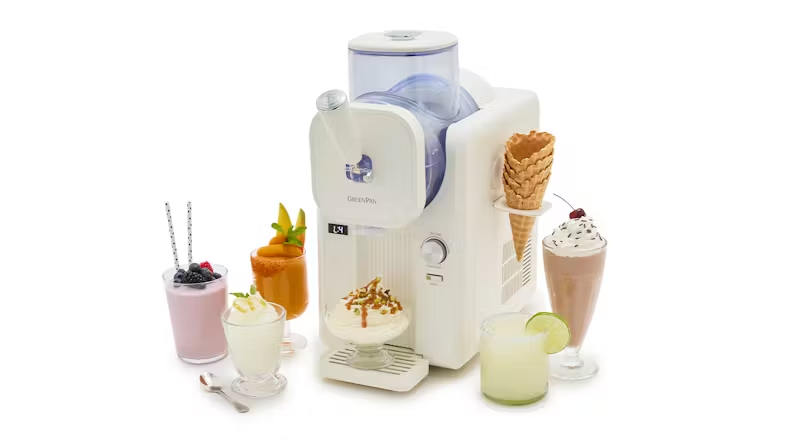
Unleash Your Inner Chef: Creative Recipes and Serving Ideas for Your 4 Quart Machine
Your 4 quart ice cream maker is a canvas for culinary creativity, inviting you to explore a universe of frozen delights beyond plain vanilla (though a perfectly churned vanilla is a masterpiece in itself!).
- Classic Comforts with a Twist: Start with foundational recipes for traditional vanilla or rich chocolate. Once mastered, experiment! Add a hint of chili to your chocolate, a swirl of homemade caramel to your vanilla, or a generous sprinkle of sea salt flakes for an elevated experience.
- Fruity Fantasies: Sorbet and gelato are fantastic options for your 4 quart ice cream maker. Think vibrant berry sorbets, tangy lemon gelato, or refreshing pineapple sorbet. Using fresh, seasonal fruits will ensure the brightest, most natural flavors.
- Decadent Delights: For those who love indulgence, consider creating unique combinations. Peanut butter chocolate chip, rocky road with homemade marshmallows, or cookie dough with generous chunks of your favorite cookies are always crowd-pleasers. Don’t be afraid to fold in a bit of toasted coconut, crushed pretzels, or even a dash of espresso powder for a coffee ice cream that truly wakes up the senses.
- Serving with Style: Presentation can elevate the experience. Serve your homemade creations in elegant bowls, classic cones, or even hollowed-out fruit rinds. Offer a DIY sundae bar with an array of toppings like hot fudge, sprinkles, whipped cream, fresh fruit, and chopped nuts, allowing everyone to customize their perfect treat.
FAQs about 4 Quart Ice Cream Makers
1. What’s the main advantage of a 4 quart ice cream maker?
The primary advantage of a 4 quart ice cream maker is its large capacity, allowing you to produce a full gallon of ice cream, frozen yogurt, or sorbet in a single batch. This makes it ideal for entertaining, family gatherings, or simply stocking up your freezer with homemade treats.
2. How long does it typically take to make ice cream in a 4 quart machine?
Most 4 quart ice cream makers, especially the electric ice and salt models, can churn a batch of ice cream in approximately 20 to 40 minutes, assuming your ingredients are well-chilled before starting.
3. Do I have to use rock salt, or can I use regular table salt?
While rock salt is traditionally recommended because its larger crystals dissolve slower and maintain colder temperatures longer, you can use regular table salt or kosher salt in a pinch. However, you might need slightly more of it, and the freezing process could be a bit less efficient.
4. Can I make different types of frozen desserts in a 4 quart ice cream maker?
Absolutely! A 4 quart ice cream maker is versatile enough to produce not only traditional ice cream but also frozen yogurt, gelato, and various sorbets. The key is using the appropriate recipe and ensuring proper chilling and churning.
5. Why isn’t my ice cream freezing properly in my 4 quart machine?
Common reasons for poor freezing include insufficient chilling of your mixture or canister, not using enough ice and rock salt, or adding hard mix-ins too early. Ensure your ingredients are very cold, and maintain the correct ice-to-salt ratio throughout the churning process.
6. How should I store leftover ice cream from my 4 quart maker?
For optimal freshness and to prevent ice crystals, transfer your homemade ice cream to an airtight, freezer-safe container immediately after churning. Many 4-quart machines also come with a lid designed to fit the canister for direct freezer storage.
7. Is it normal for the motor to stop during churning?
In some models, especially those using the ice and salt method, the motor may stop automatically when the ice cream reaches a certain firmness, indicating it’s ready. If it stops prematurely, check for ice blockages around the canister or ensure the mixture isn’t too thick, preventing the dasher from moving.
Conclusion
Embracing a 4 quart ice cream maker means more than just owning another kitchen gadget; it’s an invitation to a world of creamy, dreamy possibilities. From the nostalgic charm of its old-fashioned design to the modern convenience of automatic churning, it offers an unparalleled way to enjoy fresh, customizable, and utterly delicious homemade frozen desserts.
So, go ahead, gather your loved ones, pick your favorite ingredients, and let your 4 quart ice cream maker churn its magic. There’s a special kind of happiness that comes with creating something so delightful from scratch, and with every scoop, you’re not just serving dessert – you’re serving up joy, tradition, and the sweet taste of togetherness. What sweet creation will you whip up first?