Imagine a sunny afternoon, a picnic blanket spread out in the park, or a crackling campfire under the stars. Now, imagine savoring fresh, homemade ice cream, churned right there with nothing but a little effort and a lot of fun. This isn’t a dream from a bygone era; it’s the delightful reality brought to you by the ice cream ball maker. This ingenious device combines the joy of play with the simple pleasure of fresh dessert, transforming ice cream making into an interactive adventure for all ages.
For generations, the magic of homemade ice cream has captivated hearts. While electric machines offer convenience, the ice cream ball maker reintroduces a charming, hands-on approach, making it a standout in the world of frozen treats. It’s more than just a kitchen gadget; it’s an invitation to get active, gather with loved ones, and create sweet memories, one delicious scoop at a time.
|
Our Picks for the Best Ice Cream Maker in 2026
As an Amazon Associate I earn from qualifying purchases.
|
||
| Num | Product | Action |
|---|---|---|
| 1 | Ninja NC301 CREAMi Ice Cream Maker, for Gelato, Mix-ins, Milkshakes, Sorbet, Smoothie Bowls & More, 7 One-Touch Programs, with (2) Pint Containers & Lids, Compact Size, Perfect for Kids, Silver |

|
| 2 | Cuisinart Ice Cream Maker Machine, 1.5 Quart Double Insulated Machine, Sorbet and Frozen Yogurt Maker, Ready in 20 Minutes, ICE-21RP1, Red |
|
| 3 | Cuisinart Ice Cream Maker Machine, 1.5 Quart Double Insulated Machine, Sorbet and Frozen Yogurt Maker, Ready in 20 Minutes, ICE-21P1, White |
|
| 4 | Cuisinart Ice Cream Maker Machine, 2-Quart Ice Cream, Sorbet and Frozen Yogurt Machine, Fully Automatic Double-Insulated Freezer Bowl Makes Frozen Desserts in Under 30 Minutes, ICE30BCP1, Silver |
|
| 5 | At-Home Rolled Ice Cream Maker Kit, Portable Rolled Instant Ice Cream Maker Machine Tray, DIY Stainless Steel Homemade Iced Tray with 2 Scrapers, Freeze Dessert Board for Fun Freezer Desserts, Family |
|
| 6 | Cuisinart Ice Cream Maker Machine, 2-Quart Stainless Steel Frozen Yogurt, Gelato, Sorbet, Ready in 20 Minutes, LCD Screen and Timer, ICE-70P1 |
|
| 7 | Nostalgia Electric Ice Cream Maker - Old Fashioned Soft Serve Ice Cream Machine Makes Frozen Yogurt or Gelato in Minutes - Fun Kitchen Appliance - Vintage Wooden Style - Light Wood - 4 Quart |
|
| 8 | Dash My Pint Ice Cream Maker - Compact & Convenient Single-Serving Ice Cream Maker - Makes Gelato, Sorbet & Frozen Yogurt - 1.6 Cups, Aqua |
|
| 9 | Ninja CREAMi Deluxe Ice Cream & Frozen Treat Maker for Ice Cream, Sorbet, Milkshakes, Frozen Yogurt, & More, 11-in-1, XL Capacity, Silver, Includes (2) Family-Sized 24 oz. Tubs, NC501 |
|
| 10 | Ninja CREAMi Scoop & Swirl Ice Cream and Soft Serve Maker, Sorbet, Milkshake, Frozen Yogurt, Low Calories Program & More, 13-in-1, Soft Serve Handle & (2) CREAMi 2-in-1 16oz Pints, NC701 |
|
The Magic Inside: How an Ice Cream Ball Maker Works
At its core, an ice cream ball maker is a marvel of simplicity and clever design. Unlike its electric counterparts that rely on motors and intricate cooling systems, this device is entirely manual and ingeniously self-contained. Typically shaped like a durable, oversized ball, it features two distinct compartments that work in harmony to transform liquid ingredients into creamy ice cream.
One compartment is designated for your ice cream mixture – usually a delightful blend of cream, sugar, and your chosen flavorings. The other, larger compartment holds a crucial combination: ice and rock salt. The magic truly begins when you seal the ball and start the physical activity: rolling, shaking, or even gently playing with it. This continuous motion serves two vital purposes: it churns the ice cream ingredients, incorporating air and preventing large ice crystals from forming, while simultaneously allowing the ice and salt mixture to rapidly cool the inner canister to below freezing temperatures. As “Chef Antoine Dubois,” a celebrated pastry innovator, puts it, “The ice cream ball maker leverages a timeless principle of cryogenics in a beautifully engaging way, transforming simple ingredients into a delightful treat through the power of kinetic energy and a touch of salt.” It’s an accessible, electricity-free method that brings the science of freezing right into your hands.
Why Roll Your Way to Dessert? Benefits of an Ice Cream Ball Maker
Choosing an ice cream ball maker offers a unique blend of benefits that set it apart from other dessert-making methods. Its appeal lies in its inherent simplicity and the experience it creates.
Firstly, portability is paramount. Because it requires absolutely no electricity, an ice cream ball maker is the ultimate companion for any adventure. Heading to a family picnic, a beach day, a backyard barbecue, or a camping trip? This device allows you to whip up fresh ice cream on the spot, turning any outdoor gathering into an instant dessert party. It’s lightweight and durable, designed to withstand the rigors of outdoor fun.
Secondly, the interactive and engaging nature makes it a huge hit, especially with children. Rolling the ball around isn’t just a chore; it’s part of the fun! Kids (and adults!) love contributing to the process, shaking and rolling their way to a sweet reward. This active participation not only burns off a little energy but also instills a sense of accomplishment when they finally get to taste their handmade creation. It’s a fantastic way to encourage outdoor play and family bonding.
Moreover, the ice cream ball maker is incredibly easy to clean and maintain, often made from food-safe, BPA-free materials. Its durable, soft-shell exterior also means it can take a few bumps and tumbles, perfect for enthusiastic users. With basic ingredients and a little physical effort, you can enjoy delicious, all-natural homemade ice cream without the need for complicated machinery or pre-freezing bowls. It truly embodies the spirit of DIY desserts, making fresh, creamy ice cream accessible to everyone, everywhere.
Your First Scoop: A Step-by-Step Guide to Using Your Ice Cream Ball Maker
Getting started with your ice cream ball maker is wonderfully straightforward. You’ll be enjoying homemade ice cream in no time! Here’s a simple guide to help you achieve the perfect scoop:
1. Gather Your Ingredients
You’ll need:
- For the Ice Cream: 1 pint (or 1 quart, depending on your ball size) of half-and-half or heavy cream, 1/3 cup to 1/2 cup sugar (adjust to taste), and 1-2 teaspoons of your favorite extract (like vanilla). For richer ice cream, opt for heavy cream; for a lighter texture, half-and-half works well.
- For the Freezing Compartment: Plenty of ice cubes and 1/2 cup to 1 cup of rock salt. If rock salt isn’t available, kosher salt or table salt can be substituted, though rock salt is most effective. Important: Do NOT use calcium chloride, which is a common ice melt.
2. Prepare the Mixture
In a separate bowl, thoroughly mix your ice cream ingredients until the sugar is dissolved. This ensures a smooth, even flavor.
3. Assemble Your Ice Cream Ball Maker
Your ice cream ball maker will have two openings.
- Ice Cream Compartment: Pour your prepared ice cream mixture into the metal canister designed for the ice cream. Remember to leave about an inch of space at the top to allow for expansion as the mixture freezes. Securely seal this compartment.
- Ice and Salt Compartment: Fill the larger outer compartment with ice, then add the rock salt on top. Close this section tightly, hand-tightening it. Some models come with a plastic wrench to assist with opening, but avoid over-tightening.
4. Let the Rolling Begin!
Now for the fun part! For about 20-30 minutes, roll, shake, or gently toss your ice cream ball maker around. You can do this indoors on a soft surface like carpet or outdoors in a grassy area. Encourage everyone to join in for a truly communal experience!
5. Mid-Churn Check and Refill
After about 10-15 minutes, pause the fun.
- Carefully open the ice and salt compartment, drain any melted water, and add more fresh ice and rock salt. This maintains the optimal freezing temperature.
- Open the ice cream compartment and, using a plastic or wooden spoon (to avoid scratching the interior), scrape down any frozen mixture from the sides. Stir it back into the center. Reseal both compartments tightly.
6. The Big Reveal
Continue rolling for another 10-15 minutes until your ice cream reaches your desired consistency. Once done, open the ice cream compartment, and marvel at your freshly made, creamy treat! You can enjoy it immediately or transfer it to a freezer-safe container for a firmer texture later.
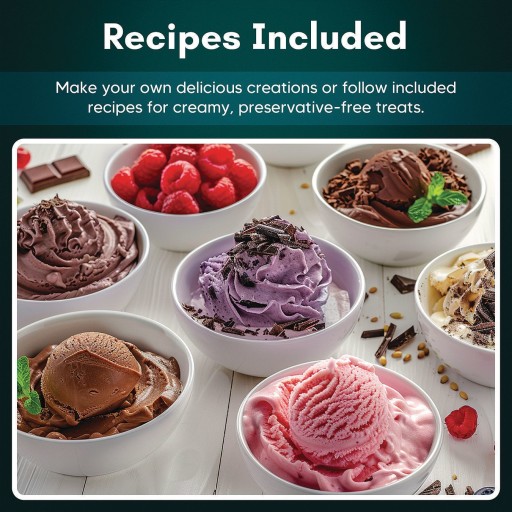
Beyond Basic Flavors: Creative Recipes for Your Ice Cream Ball Maker
While classic vanilla is always a winner, your ice cream ball maker is a canvas for endless flavor creativity. Don’t be afraid to experiment with different ingredients and combinations!
Here are some inspiring ideas, building on the basic recipe:
- Campsite Cocoa Ice Cream: For a rich chocolate treat, simply add 2-3 packets of instant cocoa mix to your half-and-half and sugar mixture. Stir well before adding to the ball.
- S’mores Adventure: After 10 minutes of churning, open the ice cream compartment and stir in 1/4 cup chopped marshmallows and 1/4 cup chocolate chips. Serve with graham crackers for dipping.
- Wild Berry Blast: Blend 1 cup of fresh or frozen berries (like blueberries or raspberries) into your cream and sugar mixture. For a richer result with high-liquid fruits, consider using heavy cream instead of half-and-half.
- Maple Pecan Delight: Substitute regular sugar with 1/3 cup of pure maple syrup for a distinctive flavor. Add 1/4 cup of chopped toasted pecans during the second half of churning.
- Coffee Buzz: Dissolve 1.5 tablespoons of instant coffee in a small amount of hot water, then add it to your cream, sugar, and vanilla base.
- Cookies & Cream Dream: Crush 1/2 cup of chocolate sandwich cookies and stir them into your nearly frozen ice cream mixture during the final stages of churning.
Pro Tip: For lighter, lower-fat options, you can use whole milk or a combination of milk and half-and-half, but be aware that these may take slightly longer to freeze. Don’t limit yourself to dairy either; explore coconut milk or almond milk bases for delicious vegan-friendly sorbets and ice creams!
Expert Tips for Ice Cream Ball Maker Success
To ensure every batch from your ice cream ball maker is a triumph, consider these expert insights and practical advice:
- The Salt Advantage: The rock salt is crucial for lowering the melting point of the ice, creating a super-cold brine that efficiently freezes your ice cream. Don’t skip it! If you must substitute, use a generous amount of table or kosher salt.
- Temperature Matters: Ensure your liquid ingredients are well-chilled before adding them to the ball. This jumpstarts the freezing process and leads to a creamier result.
- Patience and Persistence: While the ice cream ball maker is fun, it does require consistent motion. Keep that ball rolling or shaking evenly to prevent uneven freezing and ensure a smooth texture. If the ice cream isn’t firming up, you might need more ice and salt, or more rolling time.
- Handle with Care: The durable softshell is tough, but avoid kicking, throwing, or dropping the ball, especially on hard surfaces like concrete. These actions can damage the internal components and lead to leaks. “Treat your ice cream ball maker as you would any cherished kitchen tool – with respect and a little TLC,” advises culinary equipment specialist, Dr. Elena Rodriguez.
- Cleaning is Key: After each use, disassemble your ice cream ball maker and handwash both compartments with warm, soapy water. Ensure all salt residue is thoroughly rinsed off, as it can corrode metal parts over time. Allow all components to dry completely before reassembling and storing.
- The Right Utensil: When scraping down the sides of the ice cream canister or scooping out your finished product, always use plastic or wooden utensils. Metal spoons can scratch the internal surface, potentially compromising its food-safe coating.
- Storage Savvy: For the best texture, transfer any leftover homemade ice cream from the ball to an airtight, freezer-safe container. This helps maintain its freshness and prevents it from becoming overly icy.
By following these simple guidelines, your ice cream ball maker will consistently produce delightful frozen treats, bringing smiles and deliciousness to all your gatherings.
The Ice Cream Ball Maker in the Modern Kitchen (and Beyond)
In a world increasingly dominated by smart gadgets and electric appliances, the ice cream ball maker stands out as a charmingly analog tool. It carves a unique niche, not necessarily replacing traditional electric or compressor models, but complementing them with an emphasis on experience and versatility. While electric machines offer hands-off convenience for everyday use, the ice cream ball maker excels in situations where power outlets are scarce or when the journey is as important as the destination.
Its history, though not as ancient as hand-cranked churns, taps into the same spirit of communal effort and simple innovation that has defined homemade ice cream for centuries. It’s a modern take on an old-fashioned idea, designed to fit into active lifestyles. Whether you’re a seasoned camper, a parent looking for engaging outdoor activities, or simply someone who appreciates the joy of creating something from scratch with your own two hands, the ice cream ball maker offers a refreshing alternative. It proves that sometimes, the simplest tools yield the sweetest rewards, fostering connection and creativity with every roll and shake.
Frequently Asked Questions about Ice Cream Ball Makers
Q: How long does it take to make ice cream with an ice cream ball maker?
A: Typically, it takes about 20-30 minutes of consistent rolling and shaking to transform your ingredients into delicious ice cream. This time can vary based on the ambient temperature and the intensity of your churning.
Q: Do I need rock salt, or can I use regular salt?
A: Rock salt is highly recommended as it creates the coldest brine, leading to faster and more efficient freezing. However, in a pinch, you can substitute a slightly larger quantity of kosher salt or even table salt. Avoid using calcium chloride.
Q: Can I use non-dairy milk in an ice cream ball maker?
A: Absolutely! Many non-dairy alternatives like coconut milk, almond milk, or oat milk can be used to create delicious sorbets or non-dairy ice creams. Be aware that these might take a little longer to freeze or result in a slightly different texture compared to dairy-based recipes.
Q: What is the capacity of an ice cream ball maker?
A: Most ice cream ball makers come in either a 1-pint or 1-quart capacity, perfect for small batches or for sharing among a few people.
Q: Is the ice cream ball maker durable for outdoor use?
A: Yes, these makers are specifically designed with a soft, durable exterior (often BPA-free and food-safe) to withstand outdoor adventures like camping, picnics, and backyard play. However, it’s best to roll them on soft surfaces like grass rather than concrete to prevent damage.
Q: How do I clean my ice cream ball maker?
A: Disassemble both compartments and handwash them thoroughly with warm, soapy water after each use. Ensure all salt residue is rinsed away to prevent corrosion, and allow all parts to air dry completely before storage.
Roll, Shake, Enjoy: Your Next Ice Cream Adventure Awaits!
The ice cream ball maker isn’t just a gadget; it’s a gateway to fun, flavor, and shared moments. It brings back the simple joy of creating something delicious from scratch, encouraging activity and laughter while delivering a perfectly creamy, personalized treat. Whether you’re planning an outdoor escapade, a lively backyard party, or simply a unique family activity, this ingenious device promises an unforgettable experience. So grab your ingredients, gather your crew, and get ready to roll your way to the freshest, most satisfying homemade ice cream you’ve ever tasted. The possibilities are as endless as your imagination, and the rewards are sweet indeed!