There’s something uniquely magical about homemade ice cream. It’s more than just a dessert; it’s an experience, a canvas for creativity, and a delightful journey into the heart of flavor. For us at Kem Hạnh Phúc, the home made ice cream maker isn’t just an appliance; it’s the key to unlocking pure joy and endless possibilities right in your kitchen. Imagine crafting creamy, dreamy treats tailored exactly to your taste, free from artificial additives, and bursting with fresh ingredients. That’s the promise of a home made ice cream maker, transforming simple ingredients into scoops of happiness.
|
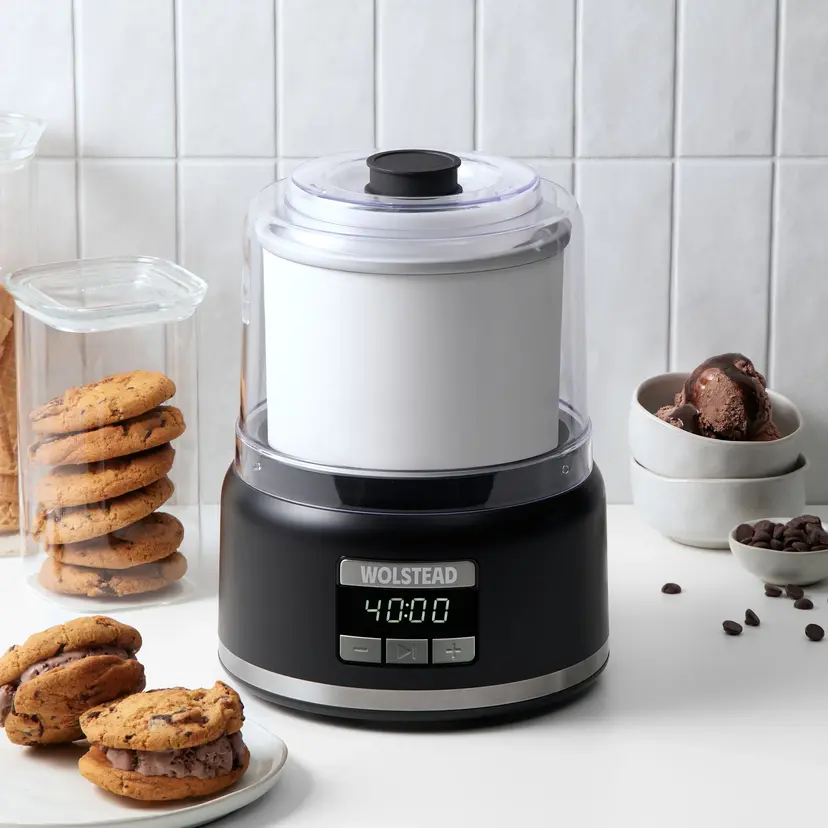
Our Picks for the Best Ice Cream Maker in 2026
As an Amazon Associate I earn from qualifying purchases.
|
||
| Num | Product | Action |
|---|---|---|
| 1 | Ninja NC301 CREAMi Ice Cream Maker, for Gelato, Mix-ins, Milkshakes, Sorbet, Smoothie Bowls & More, 7 One-Touch Programs, with (2) Pint Containers & Lids, Compact Size, Perfect for Kids, Silver |

|
| 2 | Cuisinart Ice Cream Maker Machine, 2-Quart Ice Cream, Sorbet and Frozen Yogurt Machine, Fully Automatic Double-Insulated Freezer Bowl Makes Frozen Desserts in Under 30 Minutes, ICE30BCP1, Silver |
|
| 3 | Cuisinart Ice Cream Maker Machine, 2-Quart Stainless Steel Frozen Yogurt, Gelato, Sorbet, Ready in 20 Minutes, LCD Screen and Timer, ICE-70P1 |
|
| 4 | Cuisinart Ice Cream Maker Machine, 1.5 Quart Double Insulated Machine, Sorbet and Frozen Yogurt Maker, Ready in 20 Minutes, ICE-21P1, White |
|
| 5 | Dash My Pint Ice Cream Maker - Compact & Convenient Single-Serving Ice Cream Maker - Makes Gelato, Sorbet & Frozen Yogurt - 1.6 Cups, Aqua |
|
| 6 | Ninja CREAMi Deluxe Ice Cream & Frozen Treat Maker for Ice Cream, Sorbet, Milkshakes, Frozen Yogurt, & More, 11-in-1, XL Capacity, Silver, Includes (2) Family-Sized 24 oz. Tubs, NC501 |
|
| 7 | At-Home Rolled Ice Cream Maker Kit, Portable Rolled Instant Ice Cream Maker Machine Tray, DIY Stainless Steel Homemade Iced Tray with 2 Scrapers, Freeze Dessert Board for Fun Freezer Desserts, Family |
|
| 8 | Nostalgia Electric Ice Cream Maker - Old Fashioned Soft Serve Ice Cream Machine Makes Frozen Yogurt or Gelato in Minutes - Fun Kitchen Appliance - Vintage Wooden Style - Light Wood - 4 Quart |
|
| 9 | Cuisinart Ice Cream Maker Machine, 1.5 Quart Double Insulated Machine, Sorbet and Frozen Yogurt Maker, Ready in 20 Minutes, ICE-21RP1, Red |
|
| 10 | Ninja CREAMi Scoop & Swirl Ice Cream and Soft Serve Maker, Sorbet, Milkshake, Frozen Yogurt, Low Calories Program & More, 13-in-1, Soft Serve Handle & (2) CREAMi 2-in-1 16oz Pints, NC701 |
|
The Sweet History of Frozen Delights: Evolution of the Ice Cream Maker
The journey of ice cream itself is a fascinating one, dating back to ancient times with snow and ice flavored with honey and fruit. But the ability to create consistently smooth, churned ice cream at home is a more recent marvel. Early ice cream makers were primarily hand-cranked affairs, often involving a bucket of ice and rock salt surrounding a metal canister, requiring considerable effort but yielding delicious results. Over time, innovation brought about electric motors, self-freezing compressors, and even specialized attachments for your trusty stand mixer. Each development has made the art of home ice cream making more accessible, faster, and truly a pleasure, evolving from a labor of love into a simple, everyday luxury.
Behind the Whirl: How Home Ice Cream Makers Work Their Magic
At its core, a home made ice cream maker performs a beautiful dance of chilling and churning. The main goal is to freeze your liquid ice cream base while simultaneously stirring it. Why both? If you just froze the base without stirring, you’d end up with a solid block of ice, full of large, unappetizing ice crystals. The continuous churning action works against this by breaking down those crystals as they form, keeping them incredibly tiny and distributing them evenly throughout the mixture. This process, coupled with the incorporation of air, is what gives ice cream its signature smooth, creamy, and delightful texture. It’s this delicate balance that turns a simple liquid into a scoopable dream. [cite: 1 how does, 5 how does]
Finding Your Perfect Churn Partner: Types of Home Ice Cream Makers
Choosing the right home made ice cream maker can feel a bit like picking the perfect companion for your culinary adventures. Each type offers its own unique charm and functionality:
Freezer Bowl (Canister) Ice Cream Makers
These are often the most popular starting point for many home chefs. They feature a double-walled bowl filled with a special coolant gel that needs to be pre-frozen for 12 to 24 hours before use. Once frozen, you simply attach it to the machine, pour in your chilled base, and let it churn. They are generally affordable and compact, making them a great entry-level option for occasional ice cream making. [cite: 3 how to, 4 top, 5 best] The main consideration is remembering to pre-freeze the bowl, which means a little planning ahead.
Compressor Ice Cream Makers
If you’re serious about your frozen treats and want the freedom to make batch after batch without waiting, a compressor model is your best friend. These machines have a built-in refrigeration unit, so there’s no need for pre-freezing. You can whip up a fresh batch whenever the craving strikes, making them incredibly convenient, though they do come with a higher price tag and usually a larger footprint. [cite: 3 how to, 5 best]
Stand Mixer Attachments
Already own a powerful stand mixer like a KitchenAid? Then a freezer bowl attachment might be the perfect fit. This ingenious accessory transforms your mixer into an ice cream maker, saving you counter space and leveraging a tool you already love. Like the standalone freezer bowl models, these attachments require pre-freezing. [cite: 4 top, 5 best]
Hand-Crank Ice Cream Makers
For a touch of nostalgia and a fun, interactive experience, especially with family, the traditional hand-crank ice cream maker is a classic. These typically use an outer bucket filled with ice and rock salt to create an extra-cold environment, while you manually churn the inner canister. It’s a bit of a workout, but the reward is a truly old-fashioned, perfectly textured ice cream. [cite: 2 how does, 3 how to]
Innovative Spinners: The Ninja Creami
A newer player in the game, the Ninja Creami operates differently. Instead of churning a liquid base, you pre-freeze your entire ice cream base in a special pint container. The machine then uses a powerful blade to “spin” and pulverize the frozen block into a wonderfully smooth, soft-serve-like texture. It’s fantastic for experimenting with healthy, fruit-based “nice creams” and a variety of frozen desserts. [cite: 2 best, 3 best]
Whipping Up Happiness: A Step-by-Step Guide to Using Your Ice Cream Maker
Making your own ice cream with a home made ice cream maker is surprisingly straightforward. Here’s a typical journey from ingredients to indulgence:
- Prepare Your Base: Most recipes start with combining dairy (cream, milk), sugar, and flavorings. It’s crucial that this mixture is well-chilled before it goes into the machine – ideally, refrigerate it for at least 3 hours, or even overnight, for the best results. A cold base freezes faster and more efficiently, leading to a smoother ice cream. [cite: 1 homemade, 3 homemade, 4 easy]
- Ready Your Machine: If you have a freezer bowl model or stand mixer attachment, ensure the bowl has been completely frozen for the recommended 12-24 hours. For compressor models, simply plug it in and get it ready.
- Assemble and Pour: Once your base is thoroughly chilled and your machine is ready, assemble the components. With the machine running, slowly pour your liquid ice cream base into the churning bowl. Avoid overfilling, as the mixture will expand as air is incorporated. [cite: 3 how to]
- Churn Away: Let your home made ice cream maker do its work! The churning process usually takes between 20 to 40 minutes, depending on your machine and recipe. Watch as the liquid gradually thickens and transforms into a soft, creamy consistency, similar to soft-serve ice cream. [cite: 3 how to]
- Add Mix-ins (Optional): If you’re adding chunks of chocolate, nuts, fruit, or cookie dough, do so during the last 5 minutes of churning. This ensures they are evenly distributed without being over-processed. [cite: 3 how to]
- Harden and Enjoy: The ice cream straight from the machine will be soft. For a firmer, scoopable consistency, transfer it to an airtight container and freeze it for another 2-4 hours. Then, scoop and savor your homemade masterpiece! [cite: 3 ice cream maker, 4 easy]
Sweet Success and Smooth Sailing: Tips for Perfect Homemade Ice Cream
Crafting that perfect scoop is all about a few simple tricks. For truly divine results from your home made ice cream maker, consider these expert tips:
- Chill Everything: This cannot be stressed enough! A super-cold ice cream base is fundamental for preventing large ice crystals and achieving a smooth texture. Even chilling your mix-ins beforehand can make a difference. [cite: 1 homesteading, 3 homemade]
- Quality Ingredients Matter: Fresh, high-quality heavy cream and whole milk are your best friends. They provide the fat content necessary for a rich, creamy texture. Don’t skimp here! [cite: 3 homemade, 4 easy]
- Balance Your Sweetness: Sugar not only provides flavor but also acts as an anti-freeze, contributing to a softer, more scoopable ice cream. Adjusting sugar levels means finding the sweet spot between taste and texture.
- Don’t Overfill: The ice cream mixture expands as it churns and incorporates air. Overfilling your machine can lead to an inefficient churn and a less creamy result. Always check your machine’s capacity limits. [cite: 3 how to]
- Timing is Key for Mix-ins: As mentioned, adding mix-ins towards the end of the churning cycle ensures they retain their texture and are evenly distributed.
Beyond the Basics: Maintenance and Troubleshooting for Your Machine
Keeping your home made ice cream maker in tip-top shape ensures years of sweet memories.
- Cleaning: Always clean your machine parts thoroughly immediately after use. Most bowls and paddles are hand-wash only. Refer to your manufacturer’s instructions.
- Storage: Store freezer bowls in your freezer so they’re always ready for an impromptu batch! If freezer space is an issue, ensure the bowl is completely dry before storing in a cabinet to prevent odors or mildew.
- Common Troubleshooting:
- Ice cream too soft? This often means your base wasn’t chilled enough, or your freezer bowl wasn’t fully frozen. Ensure thorough chilling! [cite: 3 how to]
- Ice cream too hard after freezing? This is common for homemade ice cream, which lacks the stabilizers of commercial varieties. Simply let it sit on the counter for 5-10 minutes before scooping. [cite: 3 how to]
- Uneven Freezing? Make sure your machine is on a level surface and your base is evenly poured and chilled. [cite: 3 how to]
Why Go Homemade? The Irresistible Benefits of Your Own Ice Cream Maker
The question isn’t just “how,” but “why?” Owning a home made ice cream maker opens up a world of delightful advantages:
- Full Control Over Ingredients: This is perhaps the biggest draw. You decide exactly what goes into your ice cream – high-quality dairy, fresh fruits, organic sweeteners, or even dairy-free alternatives. Say goodbye to artificial flavors, colors, and preservatives found in many store-bought options. [cite: 1 pros, 2 6, 4 top]
- Healthier Options: Tailor your recipes to your dietary needs. Want less sugar? More healthy fats? Dairy-free or vegan? Your home made ice cream maker empowers you to create delicious treats that align with a healthier lifestyle. [cite: 1 pros, 2 6, 3 5]
- Endless Flavor Possibilities: From classic vanilla bean to exotic mango chili, the only limit is your imagination. Experiment with unique combinations you’d never find in a store, using seasonal ingredients or bold new spices. [cite: 1 pros, 2 6]
- Superior Freshness and Taste: There’s nothing quite like freshly churned ice cream. The texture is often smoother, and the flavors are brighter and more vibrant than anything that’s been sitting in a freezer case for weeks. [cite: 2 6]
- Cost-Effectiveness: While there’s an initial investment, making your own ice cream can save you money in the long run, especially if you’re a regular consumer of premium frozen desserts. [cite: 2 6, 4 top]
- A Fun and Creative Endeavor: It’s an activity that brings joy to the kitchen, whether you’re experimenting solo or making it a family event. The satisfaction of creating something so delicious from scratch is truly rewarding. [cite: 1 pros, 5 is an]
Unleash Your Inner Gelato Artisan: Creative Recipes and Serving Ideas
With your home made ice cream maker, the world is your oyster – or perhaps, your strawberry patch! Start with a classic base, then let your creativity flow:
- Vanilla Bean Dream: A simple, elegant base (cream, milk, sugar, vanilla bean) that pairs perfectly with everything.
- Rich Chocolate Decadence: Add high-quality cocoa powder and melted dark chocolate to your base for an intense, satisfying treat.
- Fresh Fruit Sorbets: For a lighter, dairy-free option, blend fresh fruits like mango, raspberry, or lemon with sugar and water, then churn.
- Unique Combos: How about lavender honey, fig and walnut, or even a spicy chili chocolate? Don’t be afraid to experiment with herbs, spices, and unexpected ingredients.
- Serving Suggestions: Top your scoops with homemade hot fudge, fresh berries, toasted nuts, crumbled cookies, or a drizzle of caramel. Serve in waffle cones, elegant bowls, or alongside warm brownies and fruit tarts.
Expert Insight: A Word from Kem Hạnh Phúc’s Master Creamer
“Making ice cream at home is more than just a culinary task; it’s a profound act of self-expression and care,” says Chef An Ly, our Master Creamer at Kem Hạnh Phúc. “When you control the ingredients, you control the quality, the flavor, and ultimately, the joy you bring to your table. It’s a simple pleasure that truly elevates everyday moments into sweet celebrations.”
The Sweetest Conclusion
Embracing a home made ice cream maker is an invitation to a world of delicious possibilities. It’s about taking control of your ingredients, exploring endless flavors, and enjoying the freshest, creamiest frozen treats imaginable. Whether you’re a seasoned chef or a curious beginner, the journey of making ice cream at home is a rewarding one, filled with creativity, flavor, and, of course, happiness. So go ahead, dust off that machine or find your perfect churn partner, and start crafting your own sweet success stories. Your taste buds, and your loved ones, will thank you!