Imagine a world where your favorite ice cream flavor is always just a churn away, crafted precisely to your liking with the freshest ingredients. That’s the magic a top-tier homemade ice cream maker brings to your kitchen. Gone are the days of settling for generic store-bought pints; with the right machine, you become the artisan of your frozen dreams. Here at “Kem Hạnh Phúc,” we believe everyone deserves to experience the unparalleled joy and deliciousness of homemade ice cream, and finding the Best Homemade Ice Cream Maker is your first step on this delightful journey.
The Sweet History and Evolution of Ice Cream Makers
The story of the ice cream maker is as rich and fascinating as a perfectly churned vanilla bean ice cream. For centuries, frozen desserts were a luxury reserved for the elite, relying on laborious manual methods of stirring mixtures in buckets surrounded by ice and salt. The true revolution began in 1842 when Nancy M. Johnson patented the first hand-cranked ice cream maker. This ingenious invention drastically cut down the preparation time, making ice cream more accessible and popular.
Fast forward to the early 20th century, with the spread of electricity and the invention of refrigerators, the electric ice cream maker emerged, removing the need for physical churning. This innovation fueled the rapid growth of the ice cream industry, making the frozen treat affordable and widely available. Modern ice cream makers continue to evolve, offering quiet, efficient, and technologically advanced machines with digital interfaces and multiple settings, proving that the quest for the perfect scoop is an ongoing adventure.
Unveiling the Different Types of Homemade Ice Cream Makers
Choosing the best homemade ice cream maker starts with understanding the various types available, each with its own charm and operational style. Whether you’re a casual churner or a serious dessert enthusiast, there’s a machine designed to fit your lifestyle.
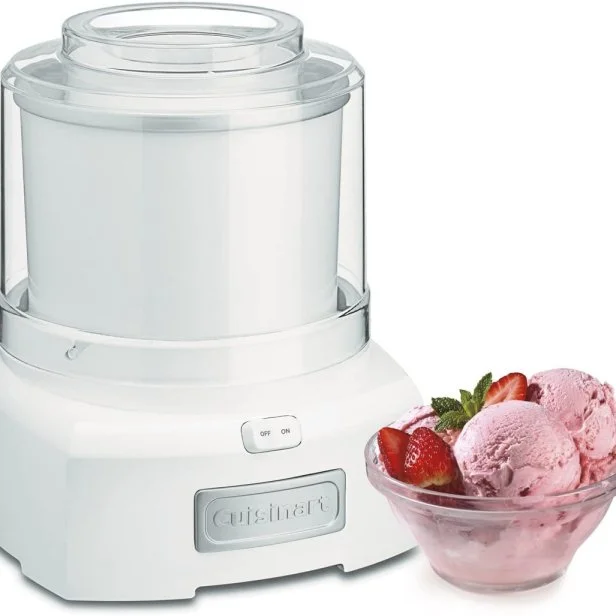
Freezer Bowl Ice Cream Makers
These are often the most common and budget-friendly options, perfect for beginners. They feature a double-insulated bowl with a sealed coolant liquid that needs to be pre-frozen for 12 to 24 hours (or overnight) before use. Once the bowl is thoroughly chilled, you simply pour in your prepared ice cream base, and the machine churns it into a soft-serve consistency in about 20 to 30 minutes.
- Pros: Generally more affordable, compact, and easy to use.
- Cons: Requires advance planning for bowl freezing, limits you to one batch at a time unless you have extra bowls.
Compressor Ice Cream Makers (Self-Freezing)
Considered the “Rolls Royce” of home ice cream makers, these machines have a built-in refrigeration system, much like a mini-freezer. This means no pre-freezing is required, allowing you to make batch after batch of ice cream on demand.
- Pros: Ultimate convenience, ability to make continuous batches, consistent results, often include advanced features like hardness settings and “keep cool” functions.
- Cons: More expensive, tend to be heavier and take up more counter space.
Ice-and-Salt Ice Cream Makers
These traditional models evoke a sense of nostalgia, using an outer bucket filled with ice and rock salt to cool an inner canister where the ice cream base is churned. Some are hand-cranked, offering a fun, interactive experience, while others are electric.
- Pros: Can make large batches, great for family activities and events, relatively budget-friendly for automatic versions.
- Cons: Can be noisy, requires purchasing and handling ice and rock salt, can be messy.
Stand Mixer Attachments
If you already own a KitchenAid stand mixer, an ice cream maker attachment can be a space-saving and cost-effective solution. These attachments typically consist of a freezer bowl and a paddle that connects to your mixer, churning your ice cream in 20 to 30 minutes.
- Pros: No need for a separate motorized unit, uses existing appliance, saves counter space.
- Cons: Requires pre-freezing the bowl, can be challenging to pour the base while the mixer is running.
Unique “No-Churn” Processors (e.g., Ninja CREAMi)
Breaking the mold, machines like the Ninja CREAMi use a distinctive method where you pre-freeze your ice cream base in special pint containers. The machine then uses a powerful paddle to finely shave and process the frozen base into a creamy dessert in just a few minutes.
- Pros: Versatile with multiple frozen treat options (ice cream, gelato, sorbet, smoothie bowls), fast processing once base is frozen, excellent for customizing with mix-ins.
- Cons: Requires pre-freezing the base for at least 24 hours, can be expensive, initial assembly might be complex.
Mastering Your Machine: How to Use an Ice Cream Maker Effectively
Using an ice cream maker effectively is crucial for consistently smooth and delicious results. It’s simpler than you might think, but a few key steps make all the difference.
Preparing Your Ice Cream Base
The journey to perfect ice cream begins with a well-prepared base. Combine your ingredients—typically heavy cream, whole milk, and sugar—and blend until the sugar fully dissolves. For optimal flavor melding and freezing, chilling your base mixture in the refrigerator for at least 30 minutes, or even overnight, is paramount. “A thoroughly chilled base is the secret to preventing large ice crystals and ensuring that coveted creamy texture,” advises Chef Alani, Head of Dessert Innovation at Kem Hạnh Phúc.
Freezing the Bowl (for Freezer Bowl Models)
This is a non-negotiable step for freezer-bowl machines. Your bowl must be frozen solid for 15 to 24 hours, or overnight, to ensure proper churning and prevent a soupy outcome. A good tip is to store your freezer bowl in the freezer when not in use, so it’s always ready for a spontaneous ice cream craving.
The Churning Process
Once your base is chilled and your bowl (if applicable) is frozen, it’s time for the magic to happen. For most machines, turn the machine on before slowly pouring in your chilled ice cream base through the spout. This prevents the mixture from instantly freezing to the sides of the bowl. Churning typically takes 20 to 30 minutes, transforming the liquid into a soft-serve consistency. The exact time can vary depending on your machine and desired firmness, so keep an eye on it.
Adding Mix-ins and Final Freezing
If you’re adding delectable mix-ins like chocolate chips, nuts, or fruit, do so during the last few minutes of churning. This ensures even distribution without crushing delicate ingredients or disrupting the freezing process. For firmer ice cream, transfer the churned mixture to an airtight container and freeze for an additional 2 to 4 hours.
Nurturing Your Machine: Maintenance and Troubleshooting
Just like any beloved kitchen appliance, your ice cream maker needs a little TLC to keep churning out happiness.
Cleaning Your Ice Cream Maker
Regular cleaning is vital for hygiene and longevity. After each use, disassemble all removable parts—paddle, lid, and bowl. Wash these components with warm, soapy water.
- Important: Never put the freezer bowl in a dishwasher, as this can damage its freezing capabilities. Always hand wash it gently.
- For the motor base, wipe it down with a damp cloth, being careful to avoid electrical components.
Common Troubleshooting Tips
- Ice Cream Not Freezing Properly: This is often due to an insufficiently chilled freezer bowl or warm ingredients. Ensure your bowl is completely frozen and your base is thoroughly chilled before starting.
- Grainy or Icy Texture: Large ice crystals typically cause this, often from slow or inconsistent freezing. Ensure thorough ingredient dissolution, consistent churning, and avoid repeated thawing and refreezing.
- Machine Not Churning Correctly: This could indicate a mechanical issue, such as a bogged-down mixer or misaligned gears. Check the assembly and ensure you’re not overfilling the machine.
The Sweet Rewards: Benefits of Homemade Ice Cream
Beyond the sheer delight of a freshly churned dessert, making your own ice cream with the best homemade ice cream maker offers a myriad of benefits.
- Unrivaled Freshness and Quality: Homemade ice cream boasts a superior texture and flavor because you enjoy it at its peak freshness, unlike store-bought versions that sit in freezers for extended periods.
- Control Over Ingredients: You have complete command over what goes into your ice cream, allowing you to avoid artificial additives, preservatives, and excess sugars often found in commercial products. This is perfect for tailoring recipes to dietary needs, such as dairy-free or sugar-free options.
- Endless Customization: The culinary world is your oyster! Experiment with unique flavor combinations, exotic spices, fresh fruits, or your favorite candies. “Homemade ice cream lets your imagination run wild,” says Chef Alani. “From classic vanilla to unexpected pairings like lavender honey or spicy chocolate, the possibilities are truly endless.”
- Cost-Effective Indulgence: In the long run, making your own ice cream can be more economical than continuously purchasing premium brands from the store.
- A Fun and Educational Family Activity: It’s a wonderful way to involve the whole family, teaching kids about cooking and the science behind freezing while building anticipation for a delicious treat.
Inspiring Your Inner “Kem Hạnh Phúc” Chef: Creative Recipes
With your best homemade ice cream maker ready, it’s time to unleash your creativity! Here are some ideas to get you started:
- Classic Vanilla Bean: The foundation of all ice cream dreams, elevated with real vanilla beans for an aromatic, rich flavor.
- Homemade Chocolate Decadence: A rich, dark chocolate base, easily customizable with chocolate chunks, fudge swirls, or even a hint of cayenne for a spicy kick.
- Zesty Lemon Raspberry Swirl Sorbet: A refreshing, dairy-free option bursting with tart lemon and sweet raspberry swirls, perfect for a warm day.
- Salted Caramel Pretzel Crunch: A harmonious blend of sweet and salty, featuring gooey caramel swirls and crunchy pretzel bits.
- Vietnamese Coffee Ice Cream: For a sophisticated twist, infuse your base with strong Vietnamese coffee, creating a bold and creamy dessert that truly wakes up the palate.
Conclusion: Your Journey to Homemade Happiness
The quest for the best homemade ice cream maker is a personal one, driven by your culinary aspirations and lifestyle. Whether you opt for the convenience of a compressor model, the budget-friendliness of a freezer-bowl unit, or the nostalgic charm of an ice-and-salt churner, the investment pays dividends in deliciousness and joy. At “Kem Hạnh Phúc,” we champion the art of homemade ice cream, inviting you to control your ingredients, customize your flavors, and savor the unparalleled freshness of every scoop. So, go ahead, pick your perfect ice cream maker, embrace your inner artisan, and let the sweet journey begin!